Steps To Add a Trusted Vendor
-
Can't find a Trusted Vendor in our network to add to a Project? That’s fine! Follow these easy steps below to invite new Trusted Vendors to participate.
Are you a Trusted Vendor, recently invited to InspectDate? Reading this page will help you to understand the steps for you to get your business up and running!
-
Step 1: Search the network
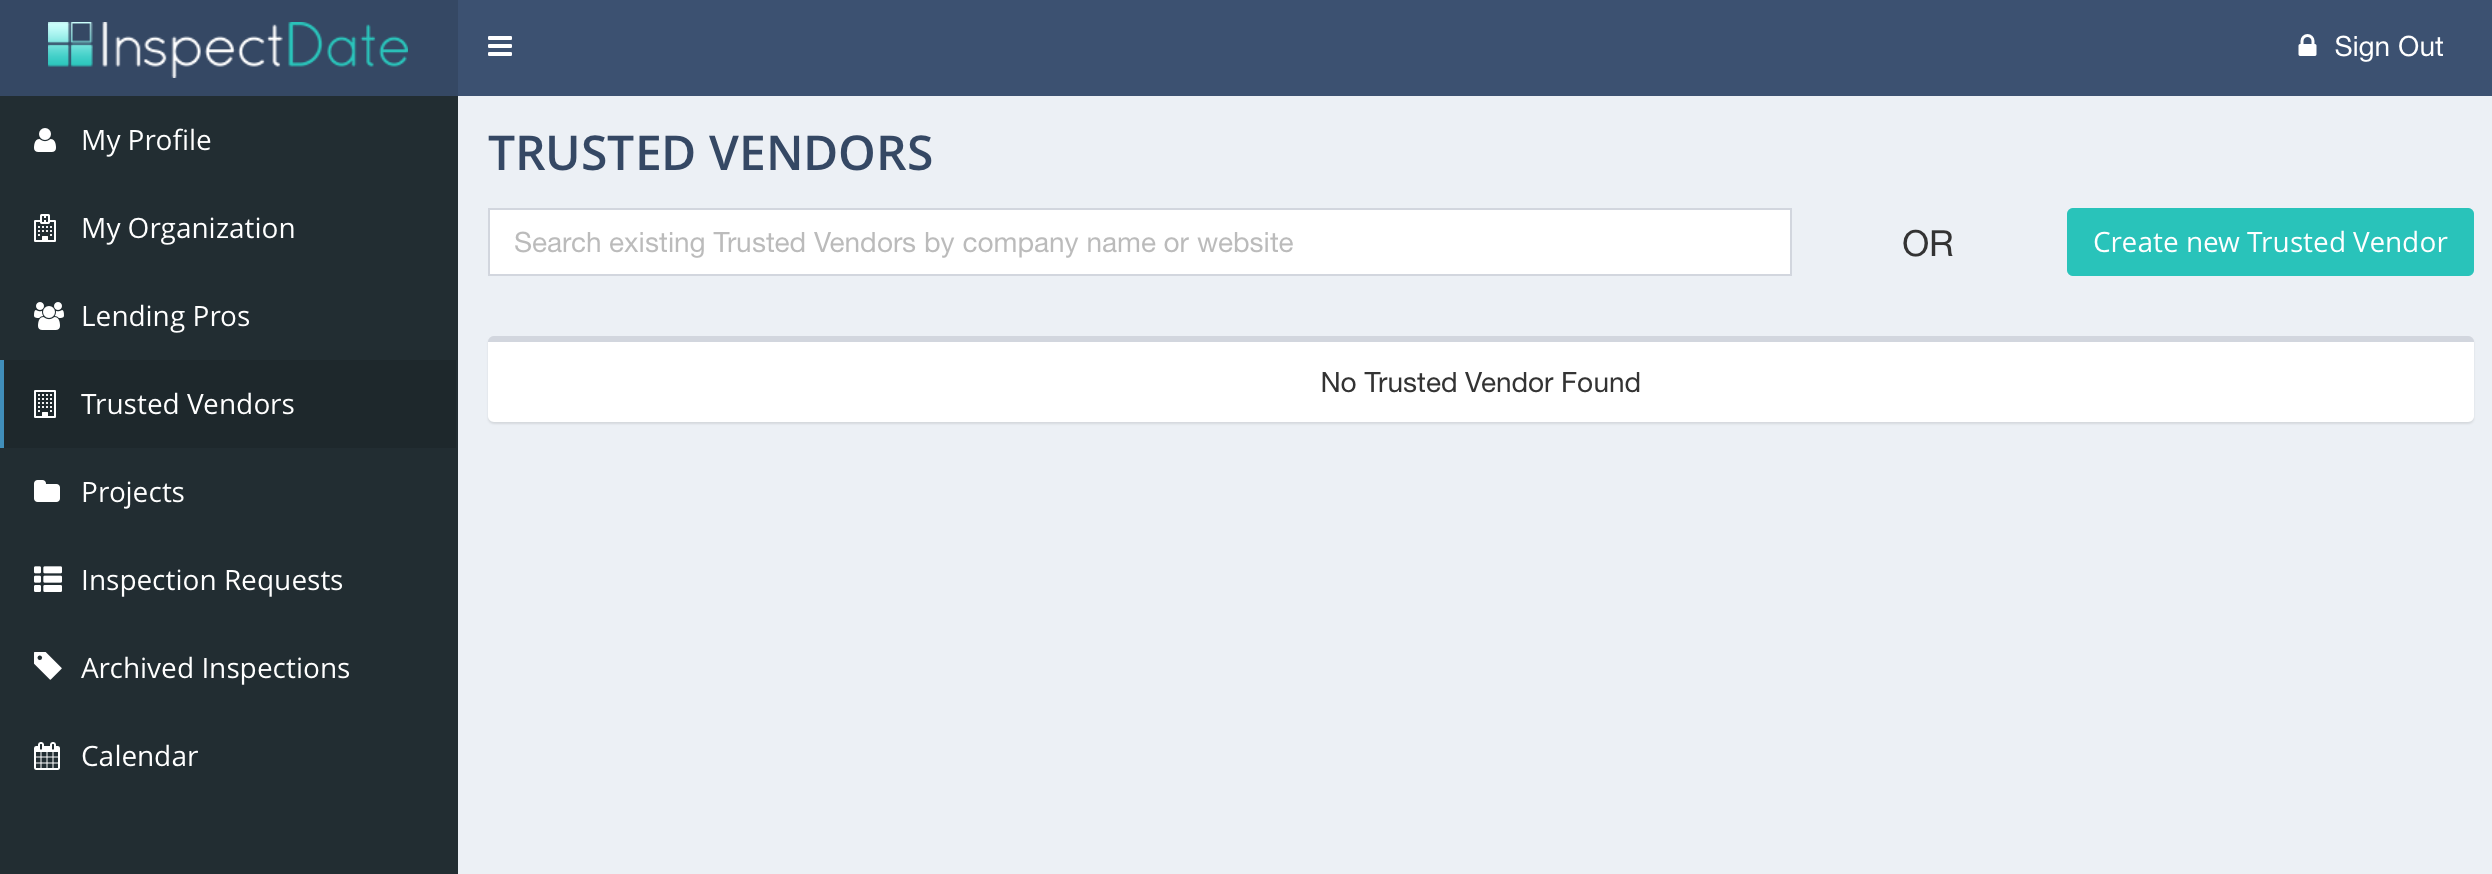
After logging in, choose “Trusted Vendors” from the side panel. In the search field at the top of the page, use either the website or company name of the Trusted Vendor. Very quickly, the company’s name will auto-populate.

-
Step 2: Select the Trusted Vendor
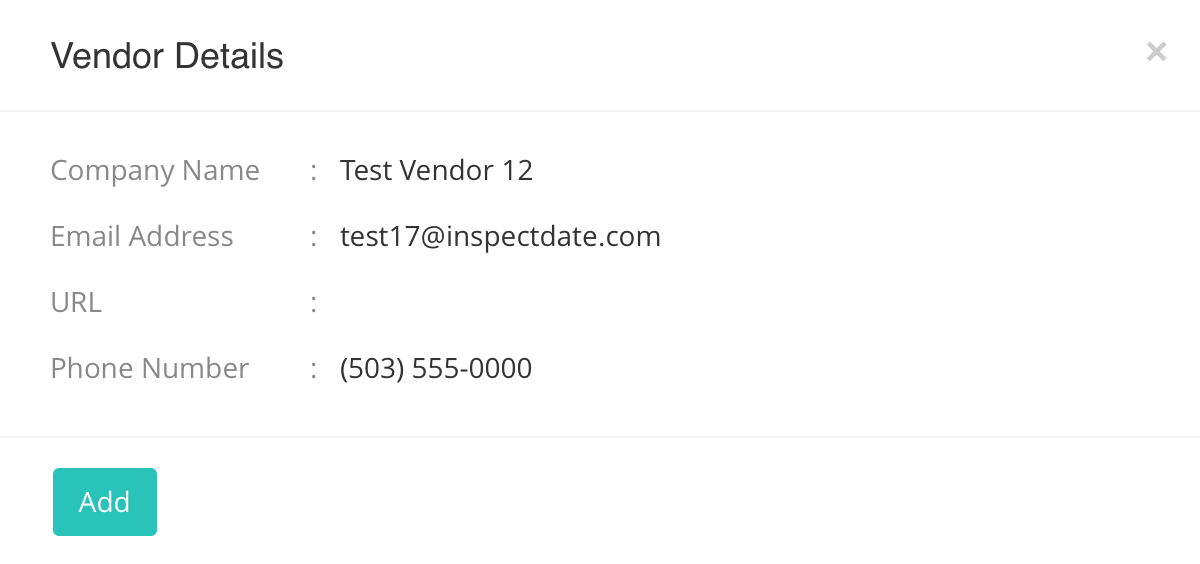
After having selected the company name from the search field, you’ll be prompted to add this Trusted Vendor. Once added, you can now start adding this Trusted Vendor to projects and inspection requests.
-
Step 3: Add a new Trusted Vendor
If you can’t find the Trusted Vendor you’re looking for in the search field then you can add the company to the network by clicking “Create new Trusted Vendor”.
-
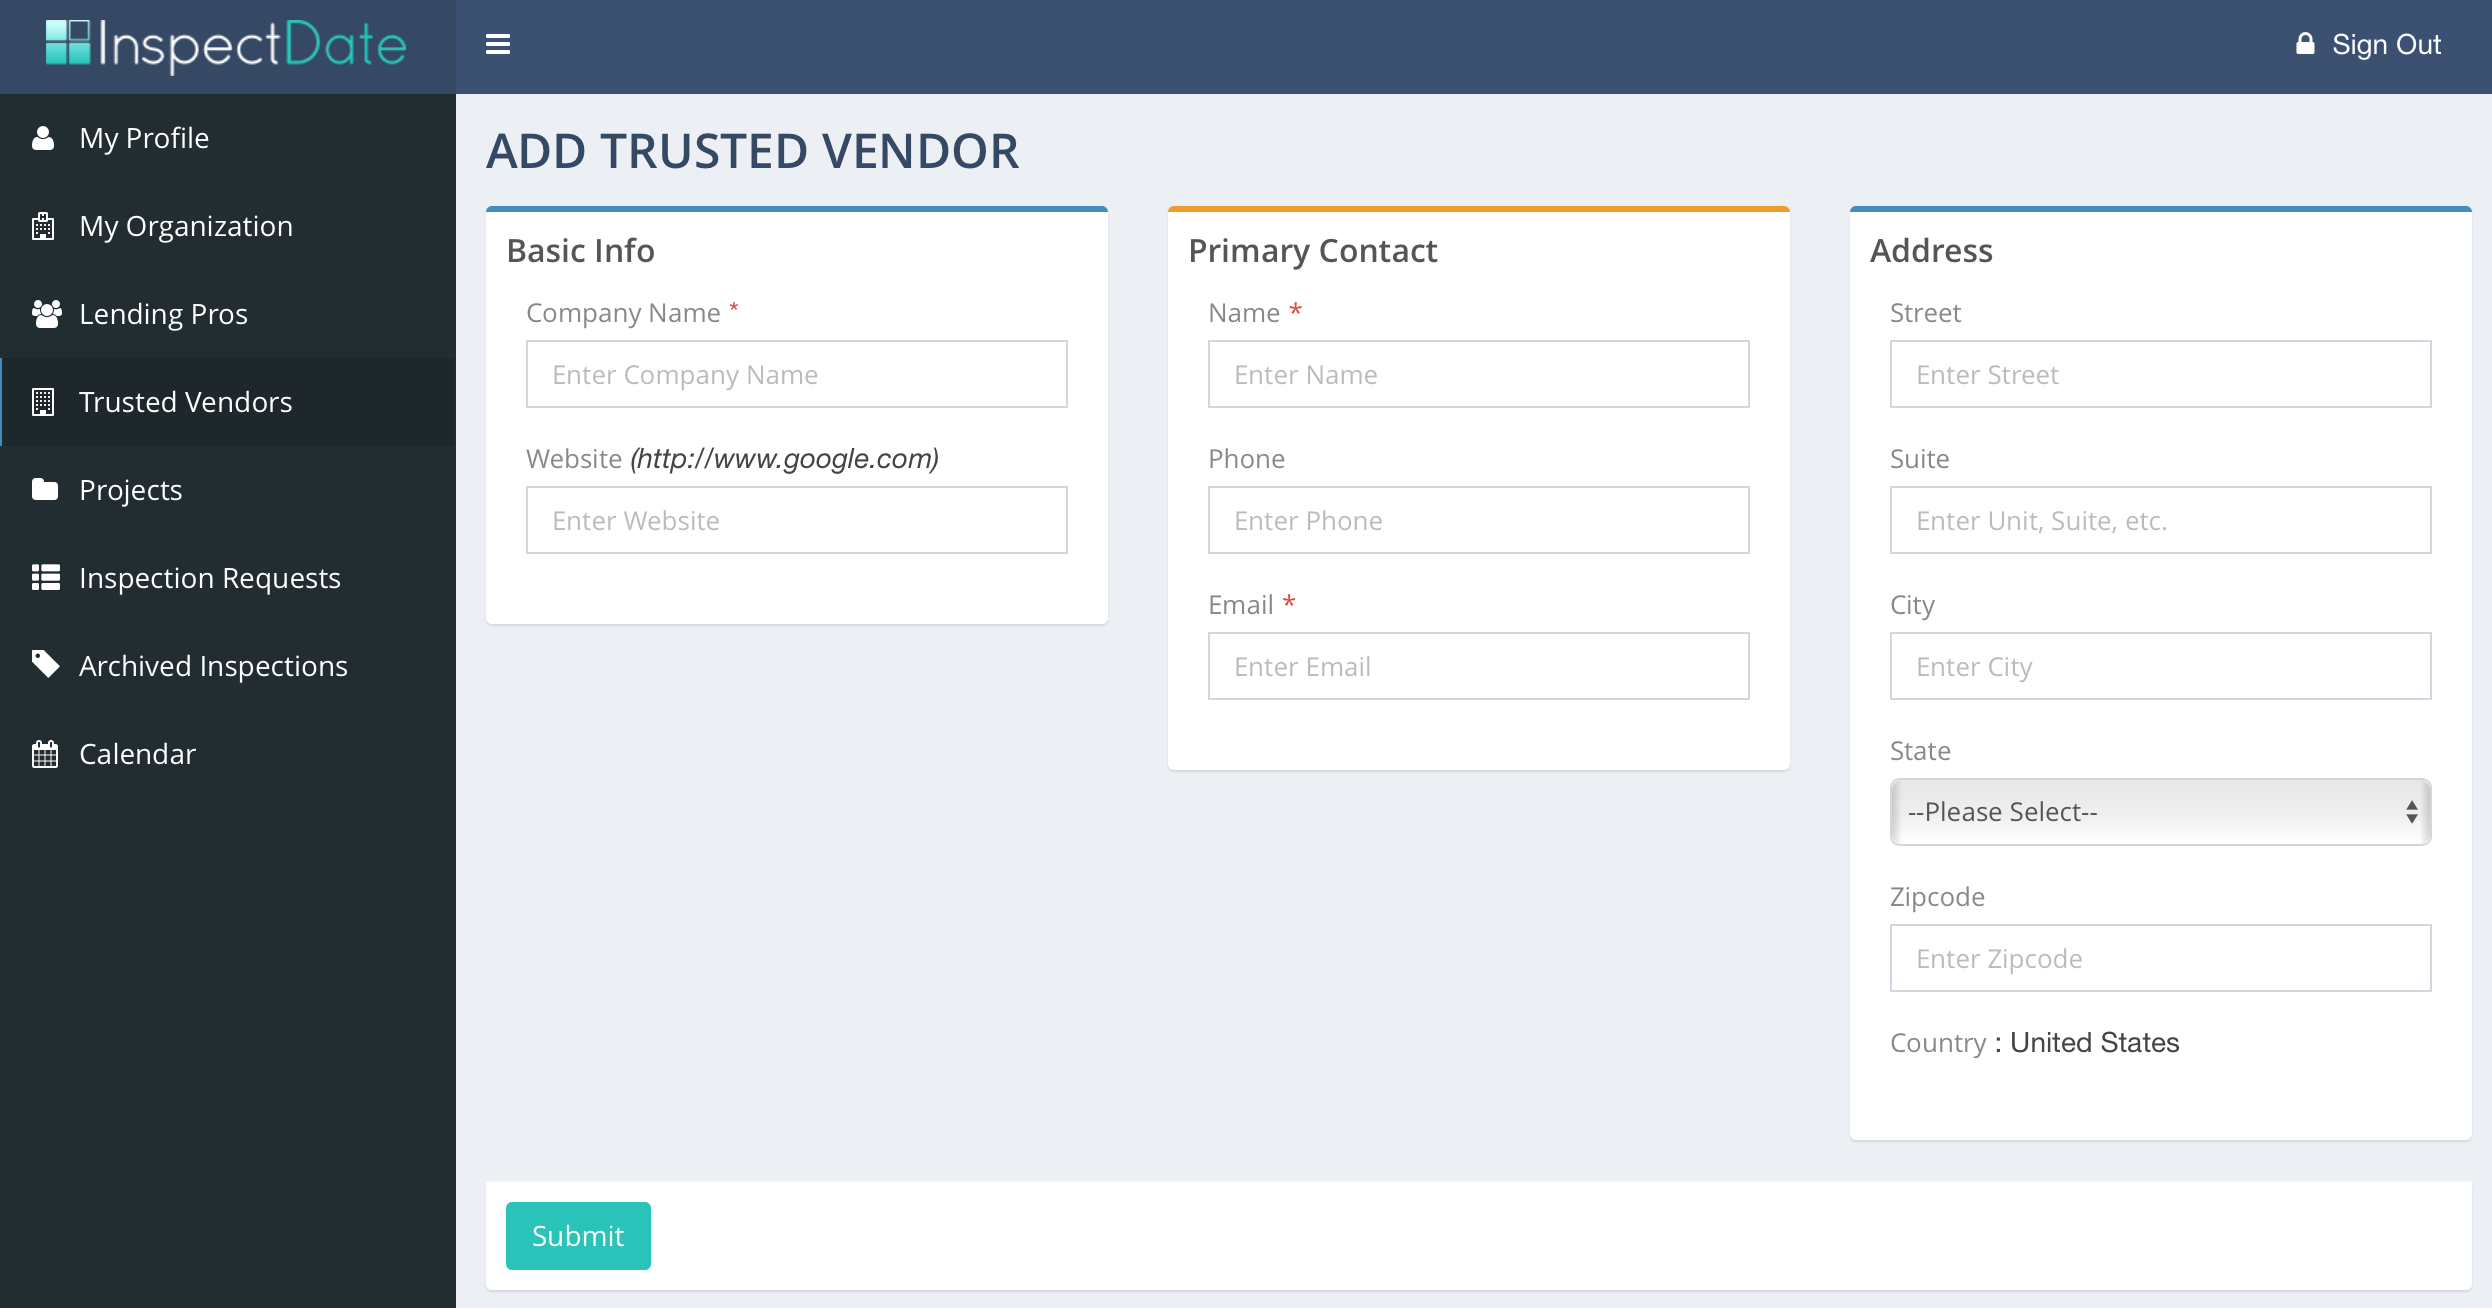
Step 4: Complete the Trusted Vendor form
After choosing to create a new Trusted Vendor, you’ll then fill this form with as much information about the company as possible. At a minimum, you’ll need the company name, primary contact name and email address. Once complete, hit submit!
-
Step 5: Trusted Vendor registers
Through an email invitation and a process similar to how your lending organization originally registered (see here for step-by-step details), the Trusted Vendor will register with InspectDate.
-
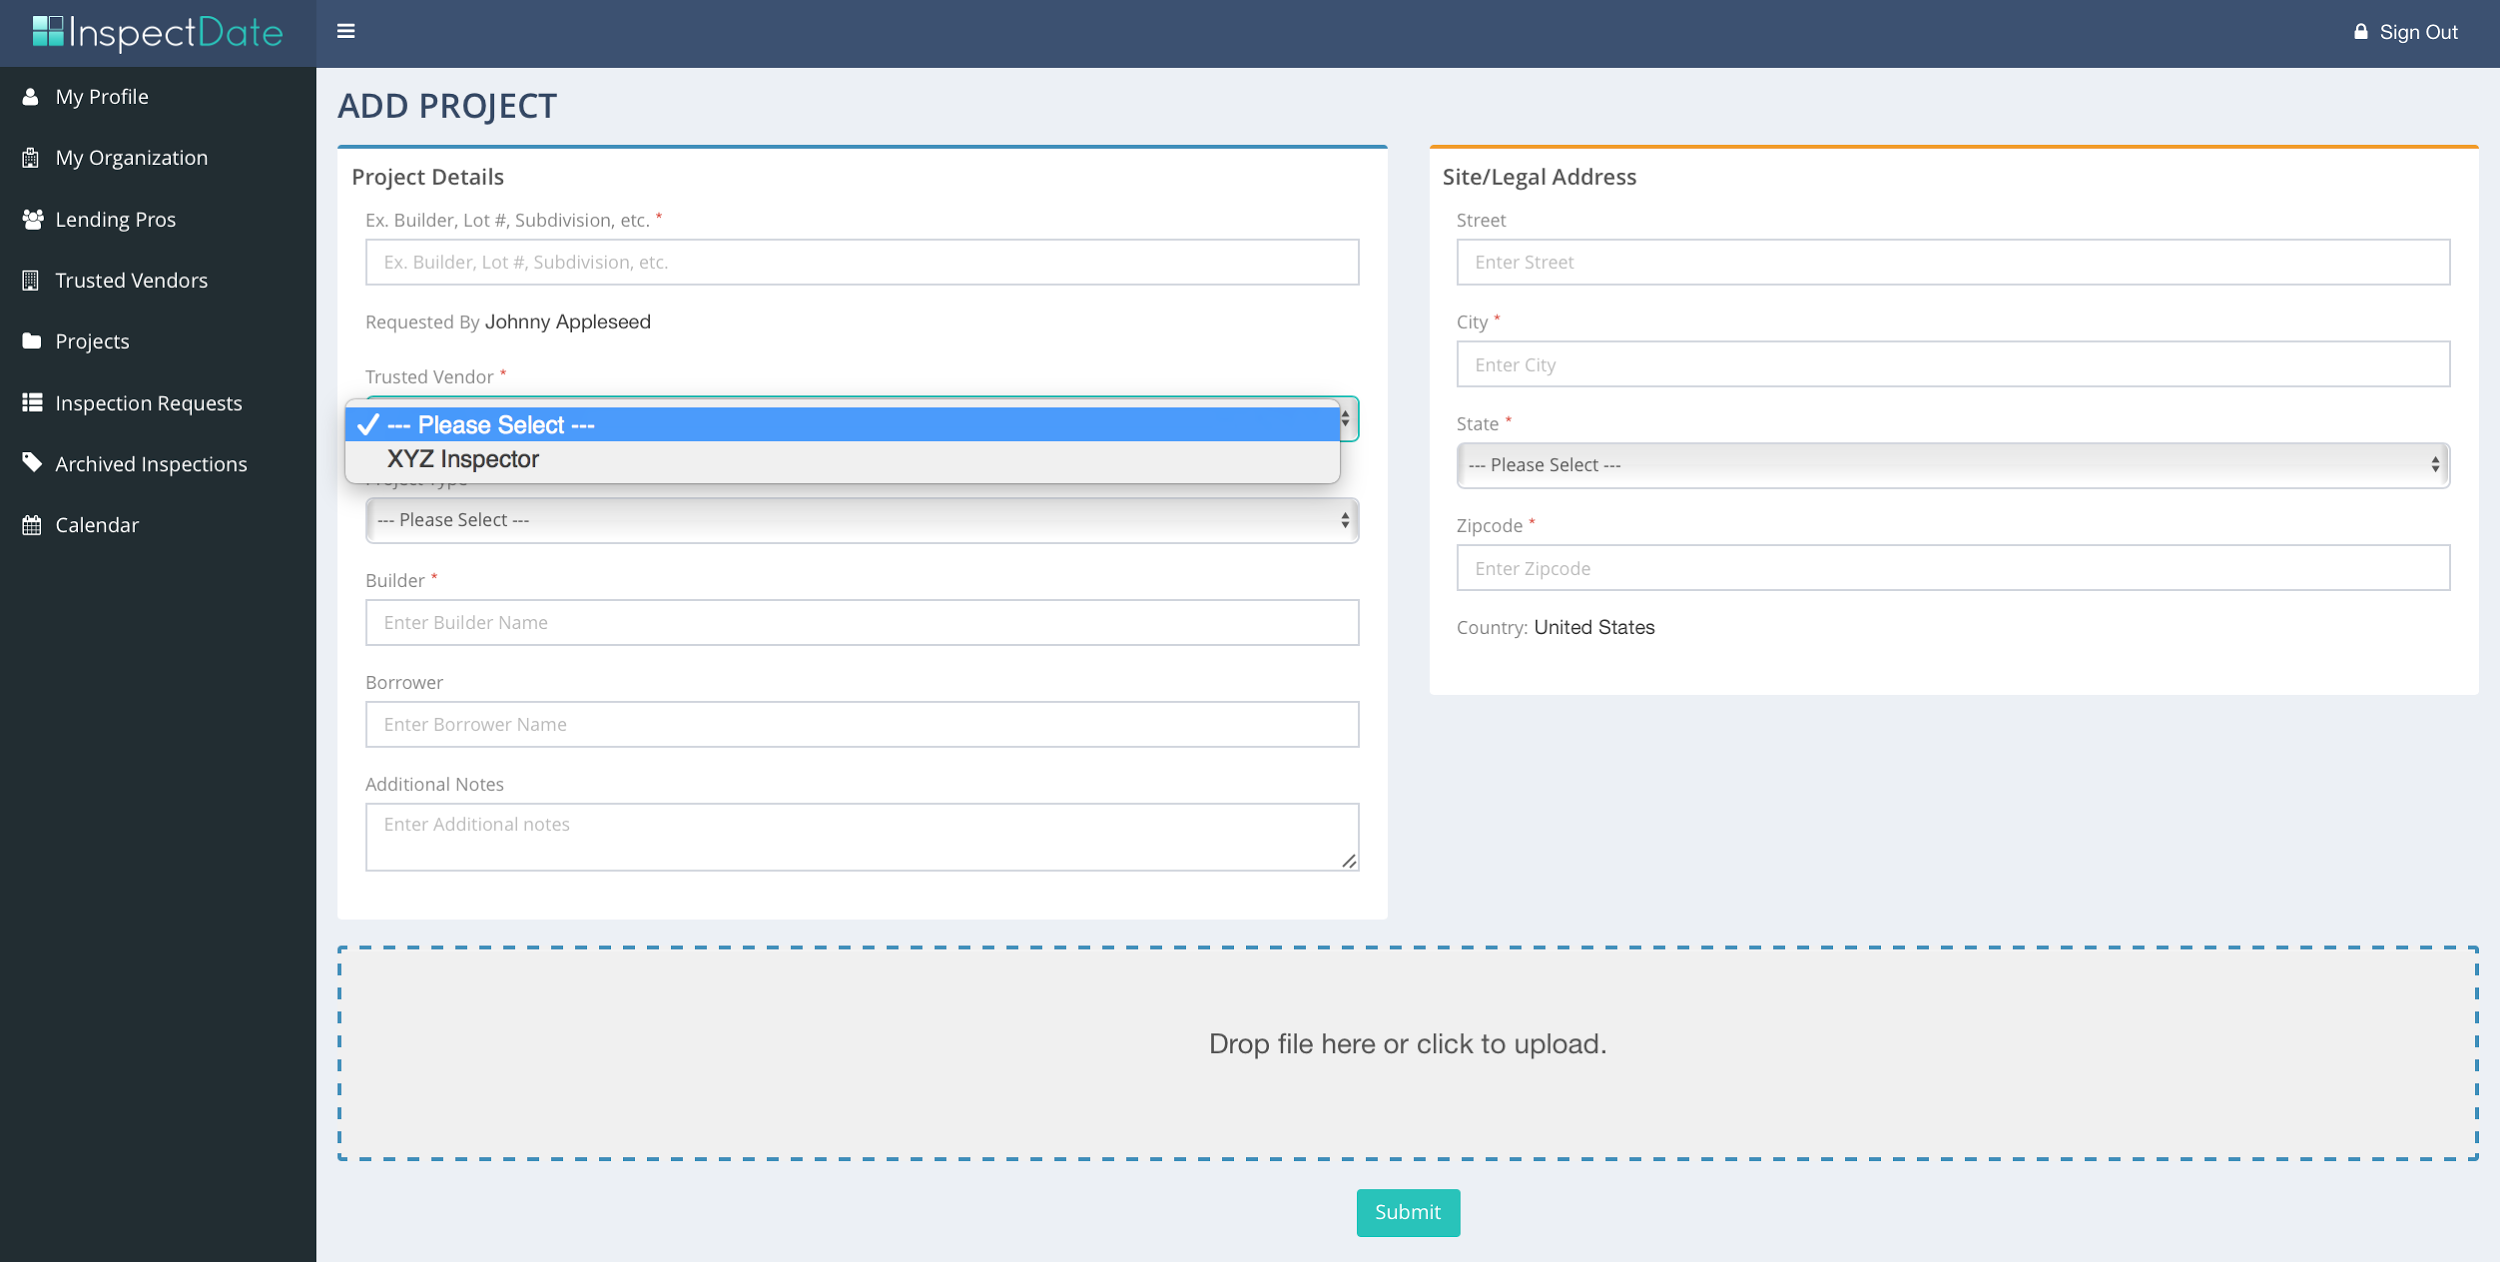
Step 6: Add the Trusted Vendor to a project
Once the Trusted Vendor registers, you can add them using steps 1 through 3 above. After that, visit the Projects page from the side panel and choose to “Add Project”. In the form, you’ll find the Trusted Vendor in the dropdown. Apart from completing the form as thoroughly as possible, you can attach any relevant documents and files.